
I’ve had a couple of requests for the Bath Bomb recipe, so here it is. There’s a printable version as well, for your convenience. Keep in mind, this is a basic recipe. It’s up to you to customize the recipe as you will with your favourite scent, colouring, add flowers, glitter, whatever you want.
The ingredients are easy to find and, realistically, you probably have most, if not all of them, on hand already. I’ve also included a link to a printable version of the recipe, for your convenience (the background will not print).
==========================================================
How To Make Bath Bombs – The Basic Recipe
Dry Ingredients:
- 1 cup baking soda
- 1/2 cup citric acid (do not substitute ascorbic acid)
- 1/2 cup corn starch
- Optional – 1/3 cup Epsom salt or coarse sea salt
Wet Ingredients:
- 2 1/2 tablespoons light oil (sweet almond, sunflower, fractionated coconut oil are a few options)
- 3/4 tablespoon water (you can use rosewater or any other floral water, or a mixture of glycerin and rosewater, but be careful as too much glycerin might start a fizzing reaction)
- at least 1/4 teaspoon and up to 1 teaspoon of desired essential oils or fragrance oils
- 1/4 teaspoon borax, as an emulsifier
- Vegetable or other natural colorant (liquid food colouring works well) (See note in the recipe)
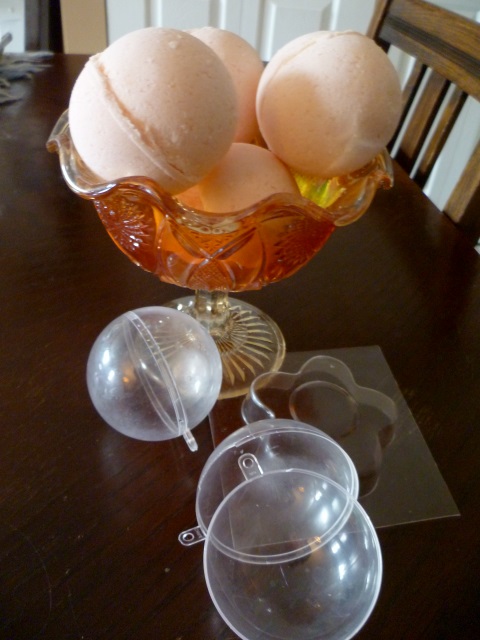
Molds – 2 part ornament balls (available at craft stores)
Sieve the first three dry ingredients together until you get a smooth blend. Try not to breathe in too much of this as you sieve. If using, add the sea salts or Epsom salts after sieving.
Set aside the dry ingredients while you prepare the wet.
Measure and combine all the wet ingredients and borax in a small clean jar. Cover tightly and shake vigorously.
Slowly and carefully, drizzle the wet ingredients into the dry, stirring constantly to prevent the reaction from starting. Make sure you mix in all of the wet ingredients. This mixture is very dry and crumbly and has to be packed into the molds quite firmly to keep shape. If you add any other ingredients (such as herbs, Epsom salts, or dried flowers), you may need to add a tiny bit more oil but be careful not too add too much as this makes the bombs soggy and may start the reaction. The mixture should just start to hold together when pressed in your hand, like very slightly moist fine sand pressed together will hold its shape. Make sure it is well mixed and try to work quickly so that it doesn’t dry out too much before you mold it.
Pack the mixture into each side of your mold quickly, throw some loose mixture on top and squish the halves together HARD (the mold doesn’t need to fit together completely; in fact, it shouldn’t, because then it’s harder to get them apart). Don’t twist the two halves; just push them straight together and smooth off any excess around the crease with your fingers.
Unmold the bombs after a few moments on to a baking sheet lined with paper towel. Unmold one side at a time, avoiding the temptation to twist the top of the mold, as this can easily split the bomb.
If the bomb splits or crumbles, empty out the mold completely, crumbling the mixture back into your work bowl and start again.
Let the bombs dry out at least 24 – 30 hours and up to one week.
Notes:
This recipe makes about four 60 mm round bombs. I used the clear plastic two-part Christmas ornament balls; you can also get an 80 mm ball ornament (the same size as the Lush bombs). Do not oil the molds beforehand but make sure they are clean and dry.
Anything can be used as a mold, as long as it doesn’t have too much detail. I’ve used soap molds and cupcake tins with success.
Powdered colorants can also be used; if using powdered colorant, add it with the dry ingredients.
Adding Epsom salts adds a bit of shine to the bomb and also seems to make the fizzing action more vigorous. It also seems to shorten the drying time required. If you want to add coarse sea salts, I recommend breaking them up a bit with a mortar and pestle or in a blender. The grains shouldn’t be larger than those of Epsom salts.
Do not substitute ascorbic acid for the citric acid as it tends to turn yellow with exposure to air, which gives your bombs a freckled appearance.
